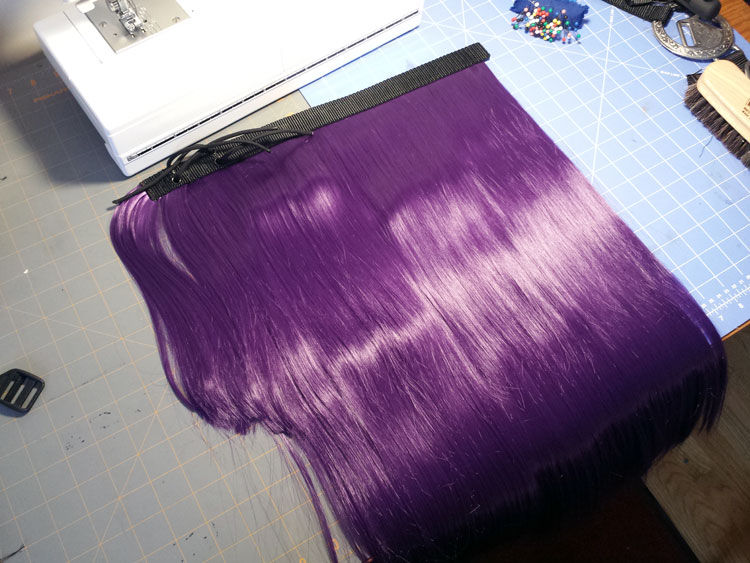
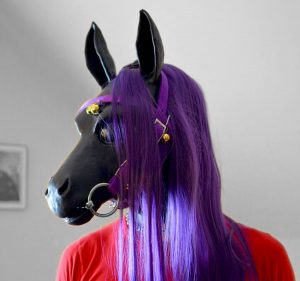
 This build is a first attempt to add a fabulous mane to an otherwise weirdly bald pony mask. While I designed this for a mask, this type of mane could easily be used on a human head. I owe much of the guidance on this build to Aaleyah from FetLife, though her methods differ from mine greatly. The hair I ordered was too short to try her method, so I went for design recommendations from DaizieDawl from FetLife. Aaleyah’s working on her own DIY article, though, so hopefully we’ll see a different approach soon!
This how-to assumes you either know how to use a sewing machine or can sew by hand (and have a lot of spare time).
Parts
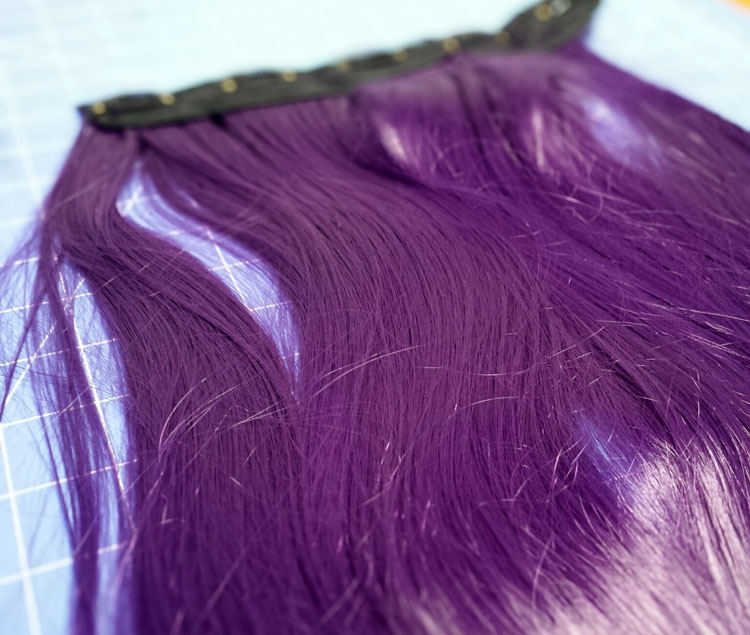
- Clip-On Hair Extensions – See step 1 before ordering! I went with 2 synthetic, straight purple extensions (approx. 10″ wide by 24″ long each) available on Amazon. Length, color, and style of hair is up to your preferences.
- At least 2′ x 1″ nylon strapping, leather, canvas, or some other material to use as a base strip to mount your hair. It should be durable and made of a material that won’t damage your hood, preferably matching your mane or mask color.
- Paracord, shoelaces, or leather thongs to attach the mane to the bridle
- 4 • 8-8 1/4″ Eyelets (with fastening mechanism of choice)
We got the eyelets and the die set from KnifeKits.com. - Hammer for eyelet-setting (unless you have another setting device)
- Heavy-duty hole punch OR pliers, butane torch, and a nail that can make a hole the same size as the eyelets. Hole-punching method/materials will depend on what material you use for your base strip.
- A sewing machine that can handle both layers of nylon/leather/whatever and the hair
Instructions
- First things first, measure your head. Where you start measuring depends on what kind of horse you are:
- A horse’s mane starts at the top of its head between the ears.
- If you’re using your own head, starting from your own hairline is best.
- Either way, starting from an inch or so beyond your bridle’s crown will give you room for the mounting hardware and a decent forelock.
Measure all the way to the back of your neck (or further, depending on how much mane you want). For me, that was about 16″
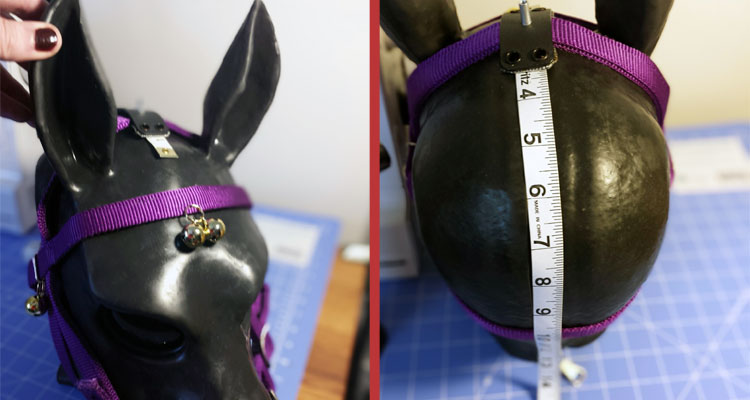
(Remember: Your hair extensions will fall far below the back of your neck.) - Buy as much hair as you’ll need to cover the length you just measured (a little extra never hurts). Not the length of the hair itself, the width of the extensions. For example, my extensions were 10″ wide with hair 24″ long. To make a 16″ mane, I needed to buy 2 sets (20″ wide total) and cut one of them back by 4″.
- Carefully remove the hair clips from the Hair Extensions. You won’t need those, just the hair and the backing it’s attached to.
- Measure and cut two lengths of your strapping/leather/whatever, both the same length you measured in step 1. These will become your base strip and top strip. Your hair will be sandwiched between these two strips.
- Pin the hair extensions to your base strip in preparation for sewing. Leave a bit of margin (1/2″–1″) at one end so you can sew the forelock on later.
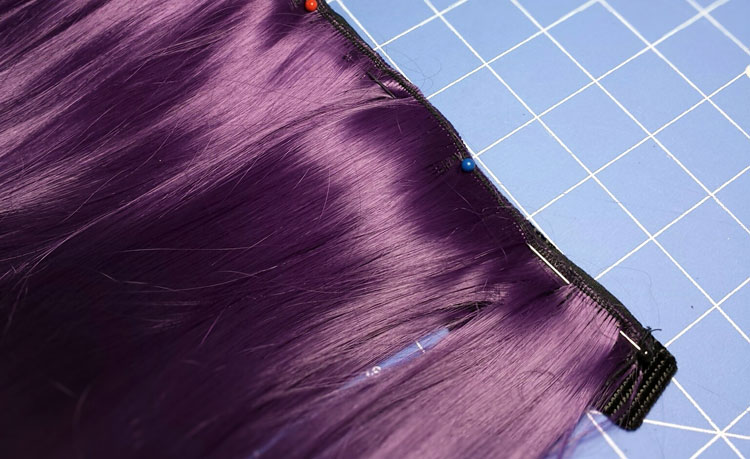
- Cut your other hair extensions to fit the remaining length of your base strip and pin it on. You may need a bit of overlap if your hair extensions are thinner on the ends. Save the leftovers for step 8.
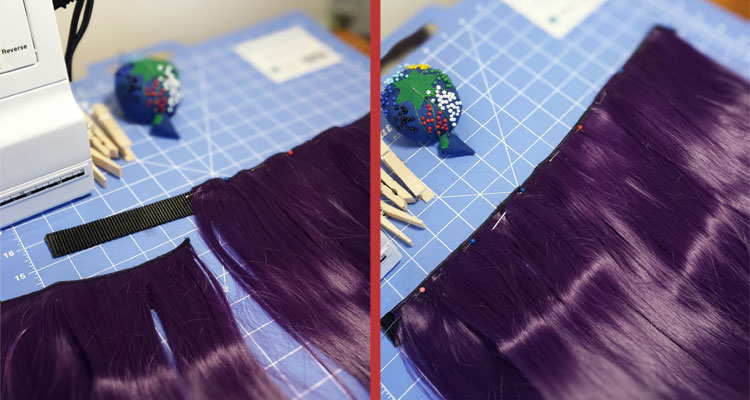
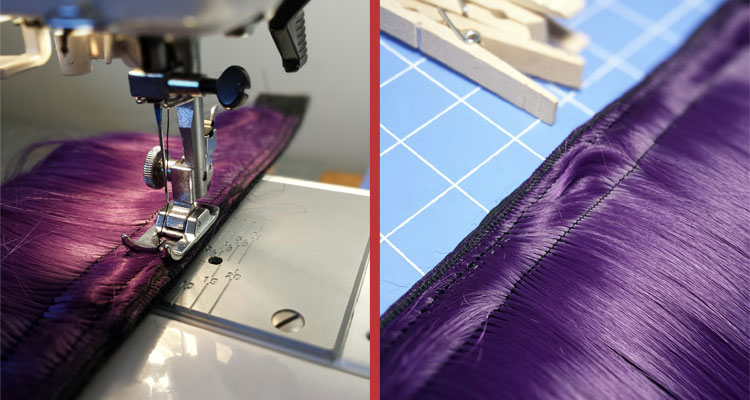
- Sew the hair extensions onto the base strip. This part sucks. It’s difficult to keep the hair from getting caught in the works or tangled as hell while sewing, so take it slowly.
- I used two straight stitches down the length of the base strip. There may be more appropriate settings, but I’m not a sewing expert.
- Some prefer to just glue the mane to the strips using Shoe Goo or a similar flexible adhesive. Since this was my first mane, I didn’t want to risk making a mistake and ruining the hair.
- Cut some of your leftover hair extensions to the width of your base strip for the forelock (and, optionally, another for the back of your neck). Since my base strip was 1″ nylon strapping, I cut another 1″ wide section of hair extension.
- Sew (or glue) the forelock piece to the tip of the base strip. I put mine a t a bit of an angle so the forelock would tend to fall the same direction as the rest of the mane. Set the whole thing aside for now.
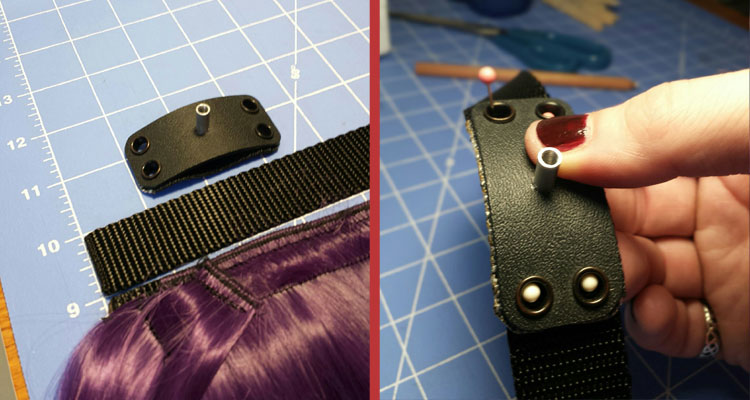
- Take your other piece of strapping/leather/whatever (which will become the top strip) and mark where you want to punch holes for mounting.
- There will be four holes with cords coming out of them. Those cords will tie on to your bridle and hold the mane in place.
- Remember to leave room for the forelock in front of the bridle’s crown!
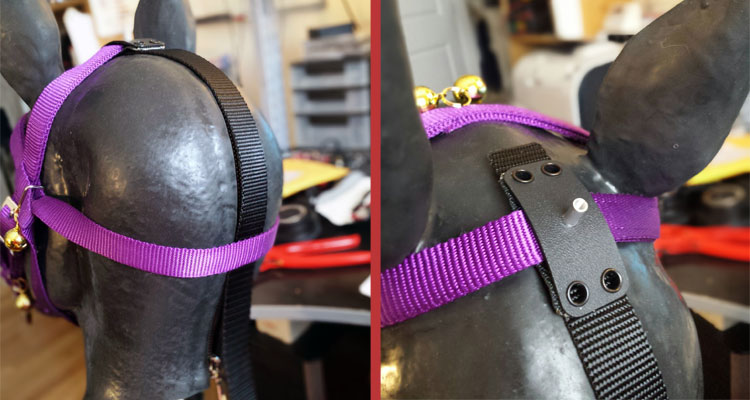
- Since I made my own Bridle Plume, I positioned the plume base on the top strip and marked the existing holes with pins. This way, I can thread the cords through those holes and use the mane with or without the plume attached.
- Just as with the Bridle Plume, make holes for the eyelets using your punch or a hot nail. Obviously, if you’re not using nylon or other synthetic materials, the hot nail method won’t work and may burn your top strip.
(Photos from the Bridle Plume build)
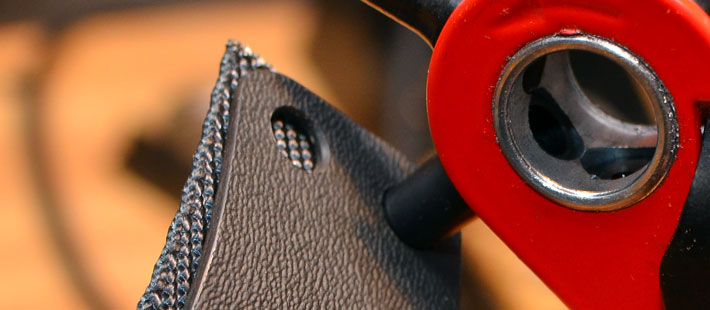

- Use your die set, and hammer to install the eyelets in the holes you made.
(Photos from the Bridle Plume build)

Note that in this photo, the holes are 2″ apart to line up with the Bridle Plume Base. If you don’t use that piece, they should be just a little wider than whatever part of your tack you intend to mount your mane to.
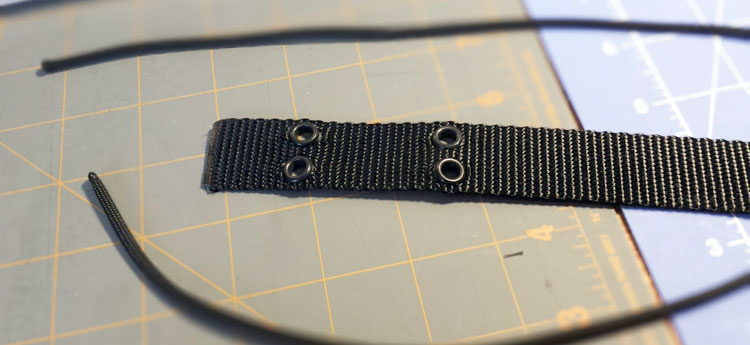
- Cut 2 lengths of your paracord, leather thong, or shoelaces at least 8″ or longer. Remember, you can always shorten them afterwards.
- Thread the cords through the eyelets so you end up with four cords of equal length on the top side of your top strip
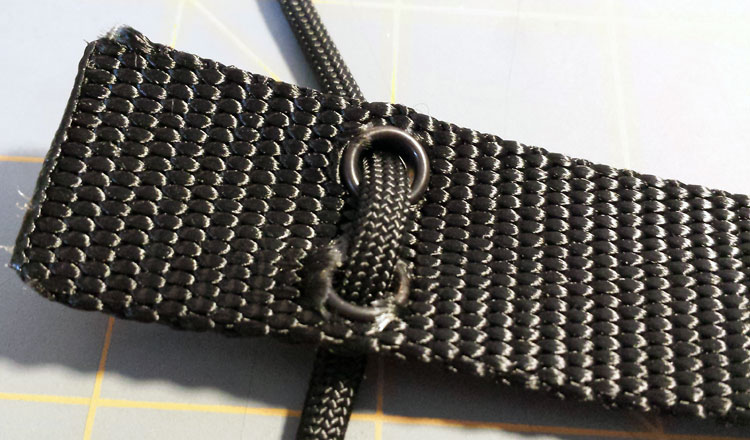
- Sew the cords into place so they don’t come unthreaded later. This can be done, though a bit tricky, with a machine. I just used a few passes with a straight stitch.
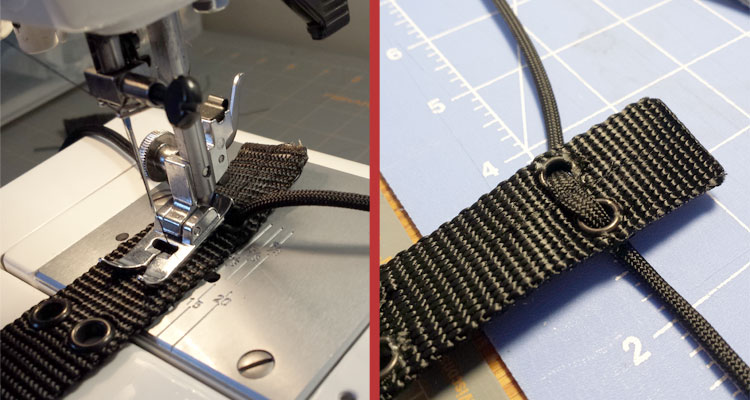
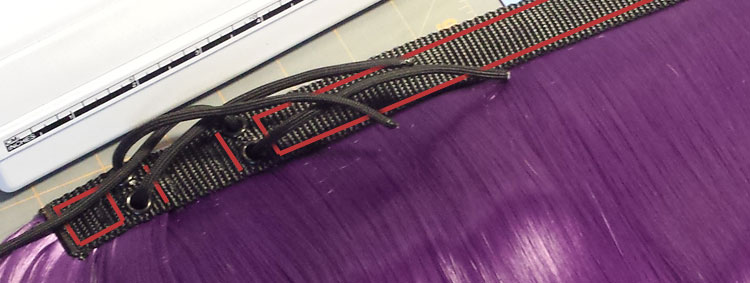
- Sew the top strip to the base strip with the cords sticking out the top near the forelock. This part really, really sucks if your machine can’t handle dense, thick materials. Also, be sure not to break your needle on the eyelets. I only sewed a few 1″ strips at the forelock end and around the eyelets, running down the length of the strip for the remainder.
- You could also add a layer of flexible adhesive like Shoe Goo to ensure that nothing comes apart, but that may cause problems for your sewing machine’s needle.
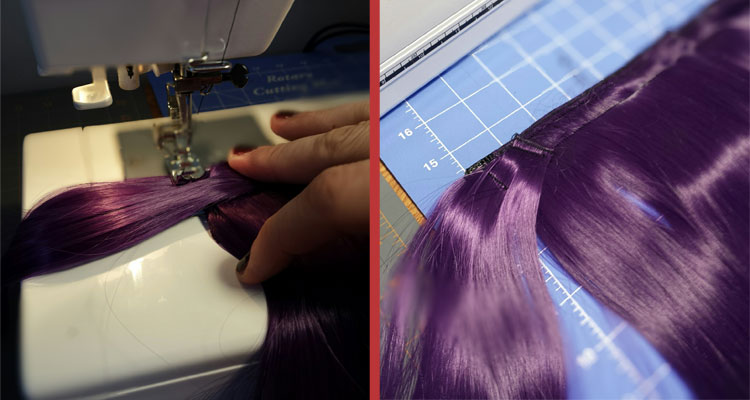
I screwed this up a few times before learning about the “wedge” technique for sewing really thick materials from sacotin.com
(My stitches are highlighted in red.)
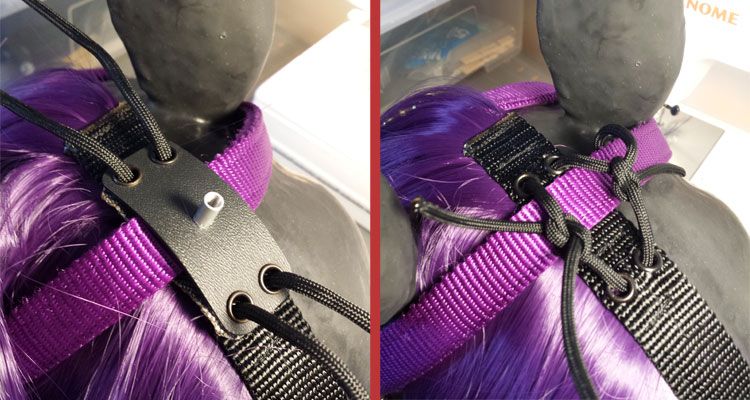
- Attach the mane to the bridle using the cords on top.
- If you’ve got a Bridle Plume Base like mine, just thread the cords through the base’s eyelets and tie them securely.
- If you don’t have a base, just tie the cords securely around your bridle’s crown.
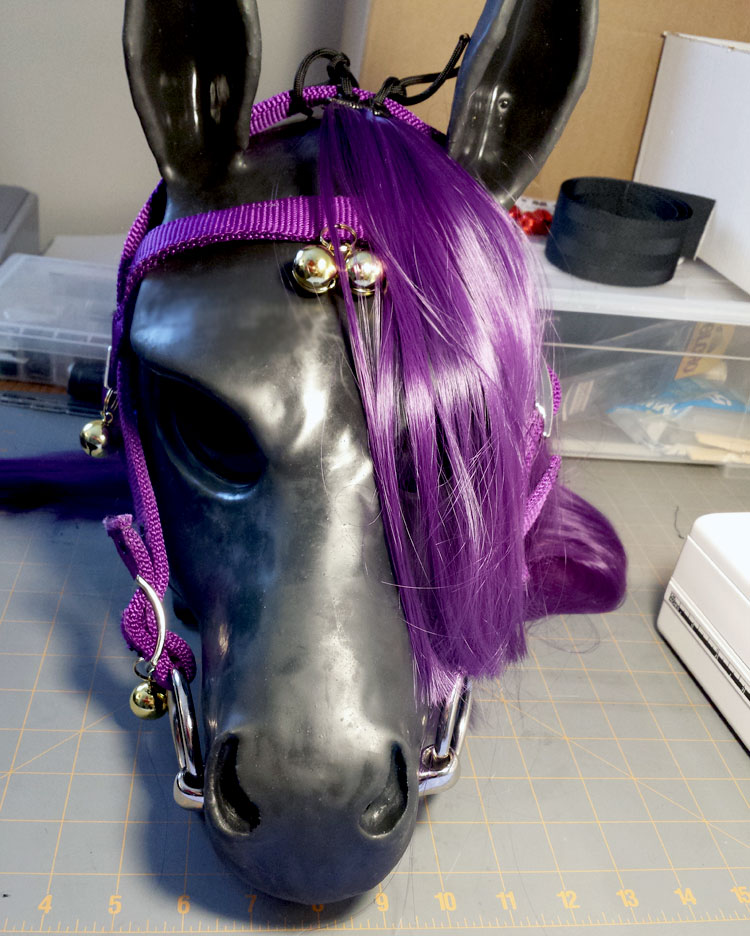
- Trimming time! I found that a 24″ forelock was… ridiculous. If that’s the look you’re going for, you’re all set, but I thought it made me look a little too much like Janice from The Muppets
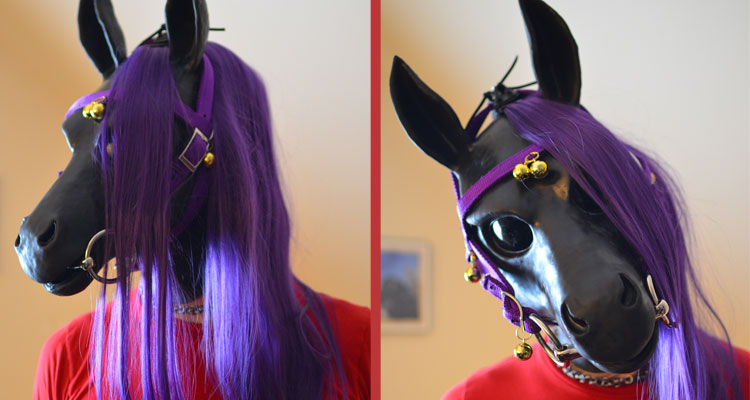
Trimming the forelock back a bit to just cover the eye gave me the look I wanted.
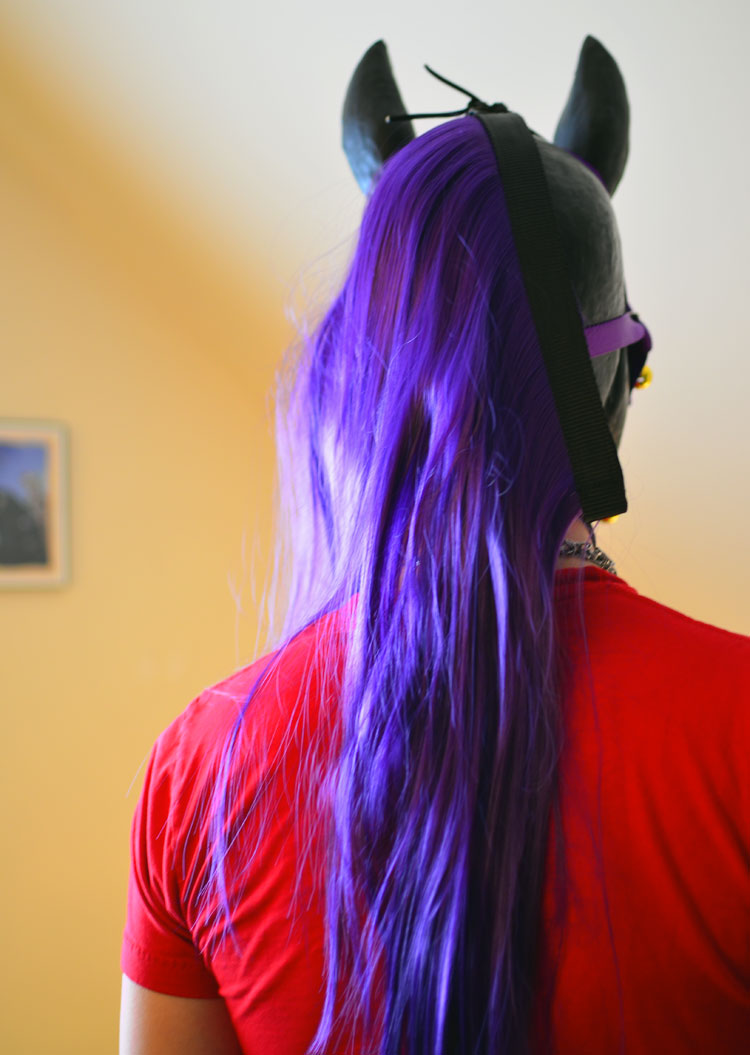
The rear looked just fine to me. For this photo I left the mane untucked in back, though it stays in place better if it’s under the rear strap. I may add a bit of soft velcro or something to help keep that part in place, but only if it becomes a problem.
- MORE trimming time! Once you’ve got experience attaching/detaching the mane from your bridle (along with various tack parts that may overlap or interact with the mane), then you can trim the cords to a suitable length. I’m most likely going to leave mine as-is and just find a place to tuck the excess once it’s securely on my head.

