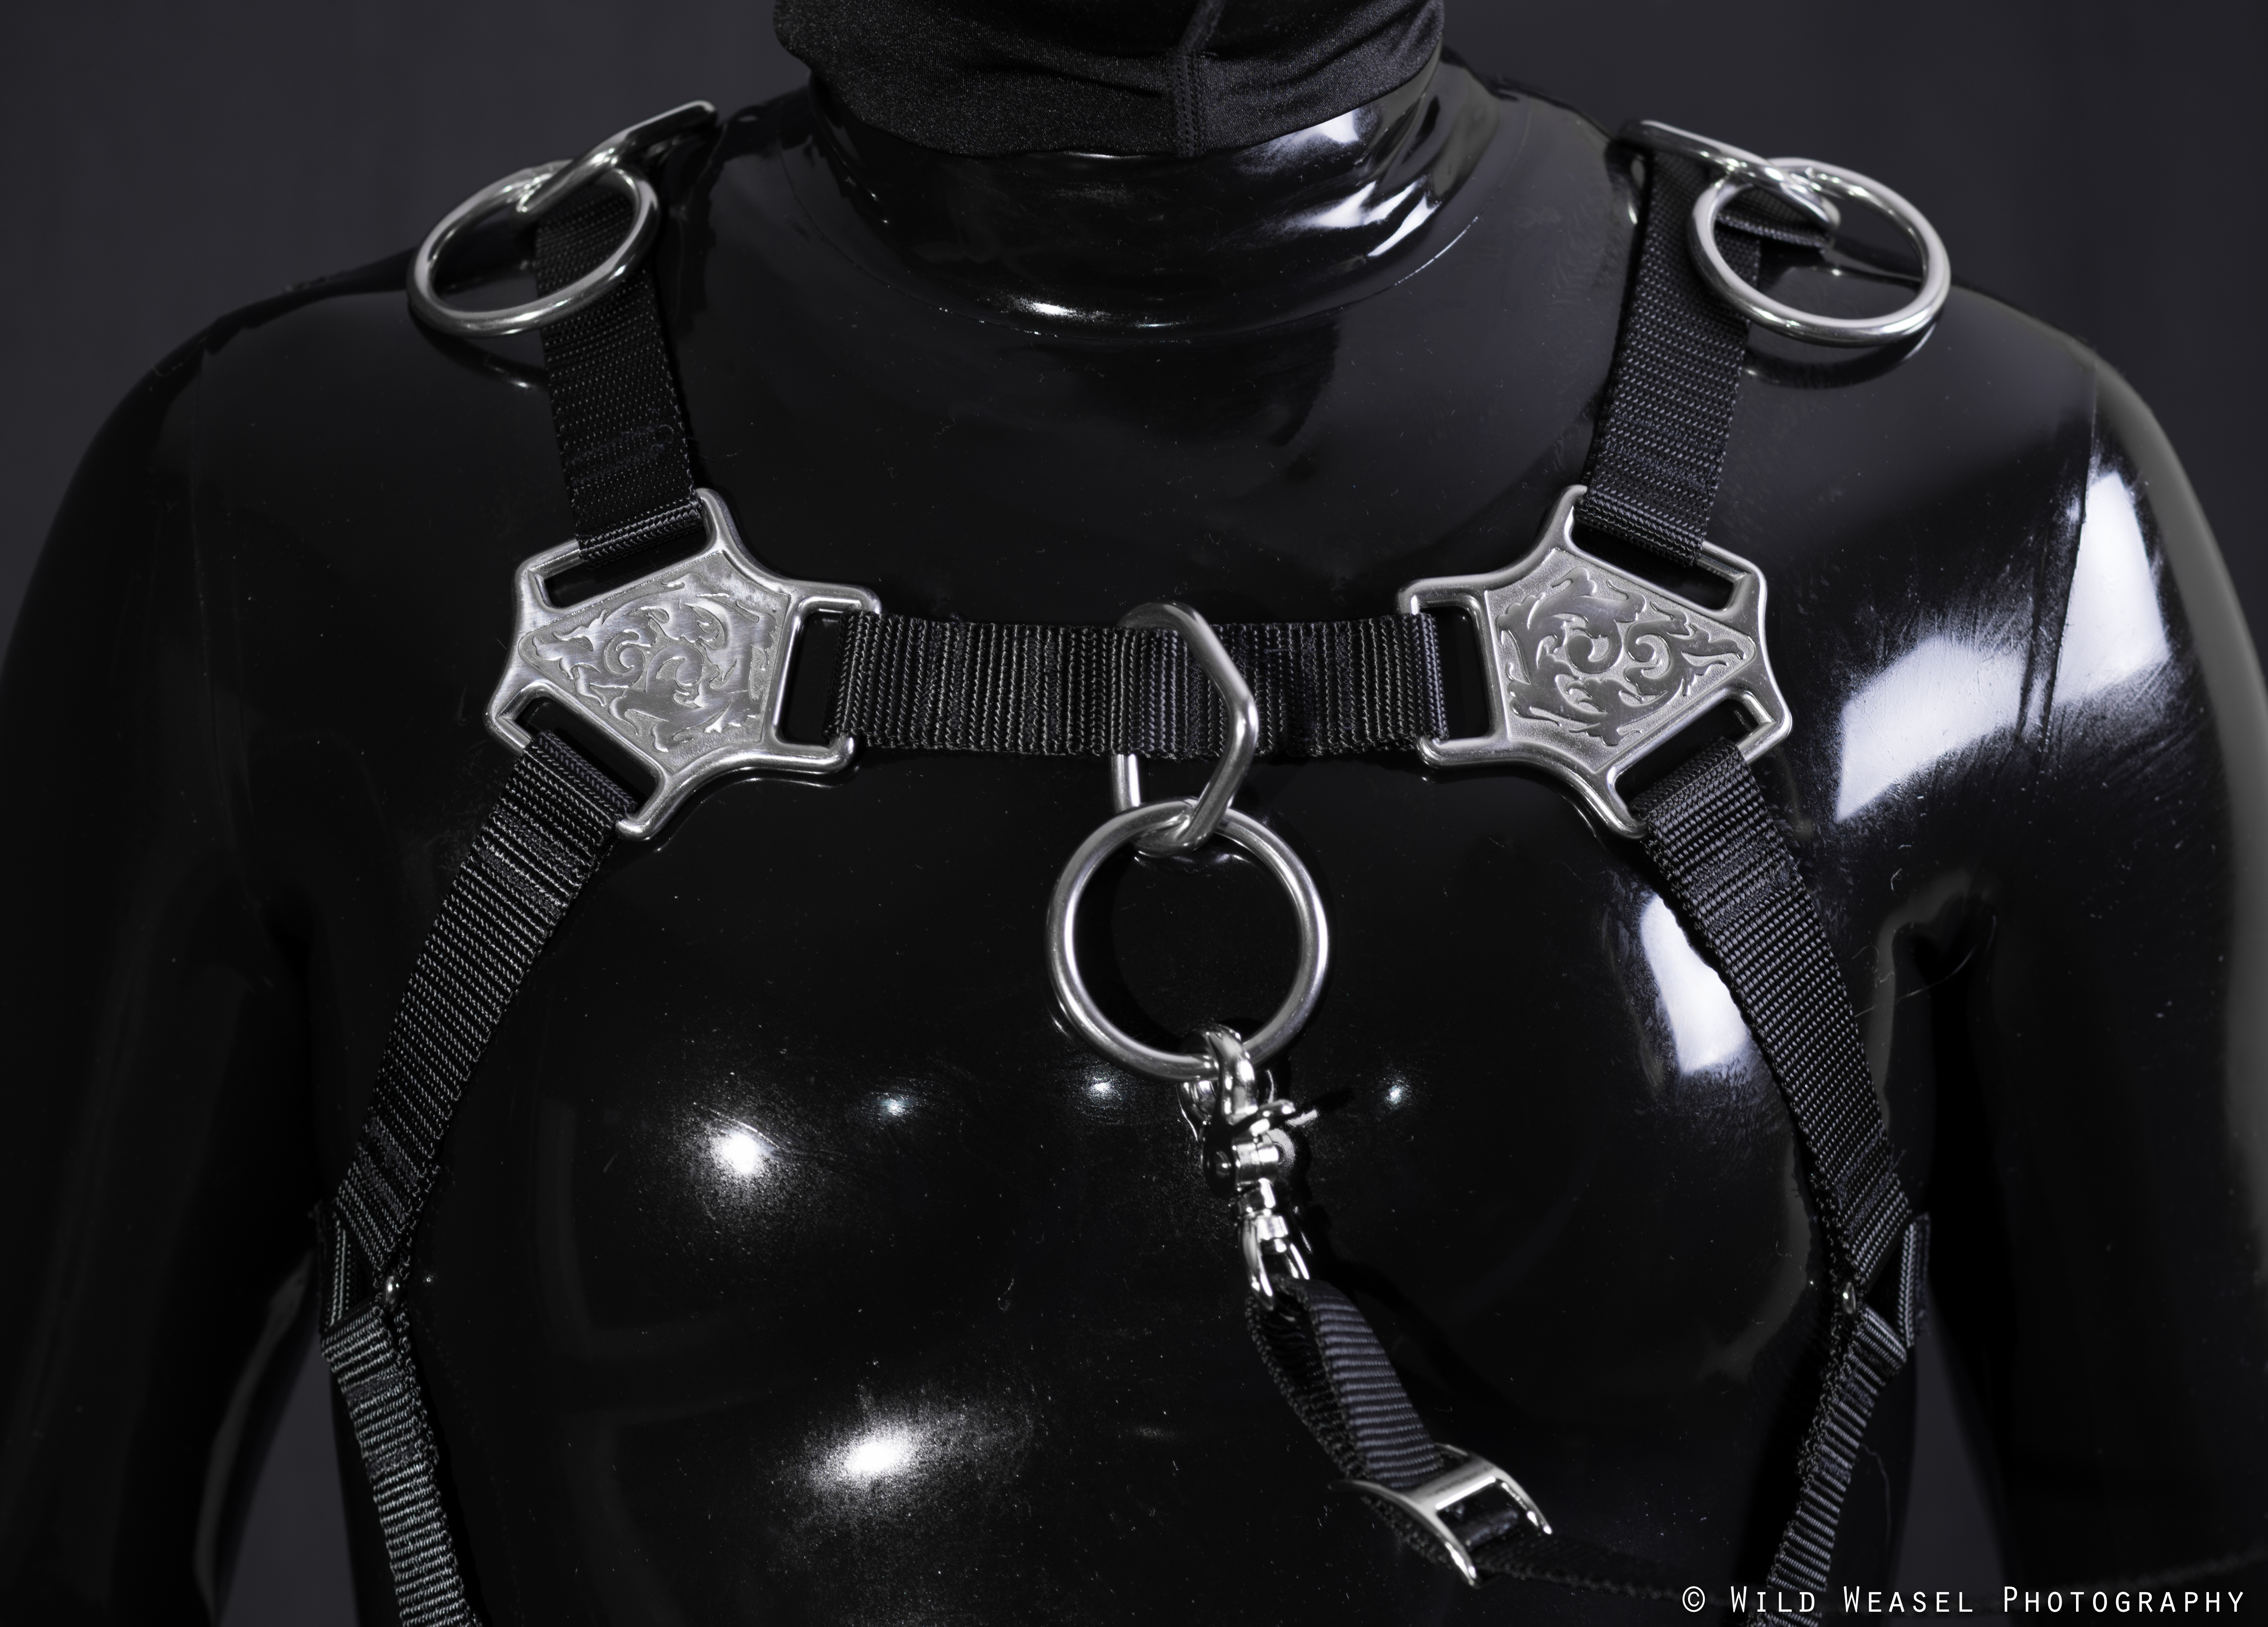
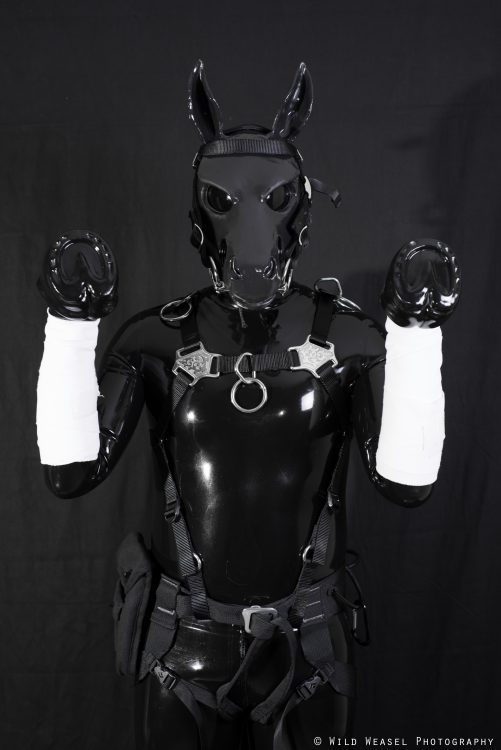
 This is Tsaro’s harness design, influenced heavily by Nighty’s Marathon Harness design for Fury Fantasy. Not everyone is a leatherworker, though. Even fewer can afford one of Fury’s Marathon harnesses, or are willing to wait long enough to get one. Nylon, on the other hand, is soft (like horses), strong (like horses!), and built for work (…you get the picture). While we say this is a “load-bearing” harness, we can’t guarantee the strength of the overall piece. That will depend entirely on your choice of nylon webbing, your choice of metal hardware, and your workmanship.
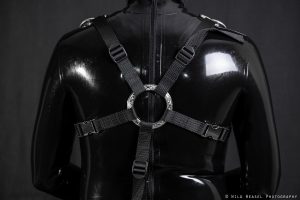 However… Since the basis of the harness is an off-the-shelf climbing harness, that portion of the build will be as strong as the harness you choose. So, in reality, you could rappel off a cliff as a pony if you wanted to, just make sure you’re only using parts of the un-modified climbing harness when you do. We’ve pulled carts with these harnesses, so we know they’re qualified for that much at least.
This how-to assumes you either know how to use a sewing machine and can sew by hand (and have a lot of spare time).
Parts
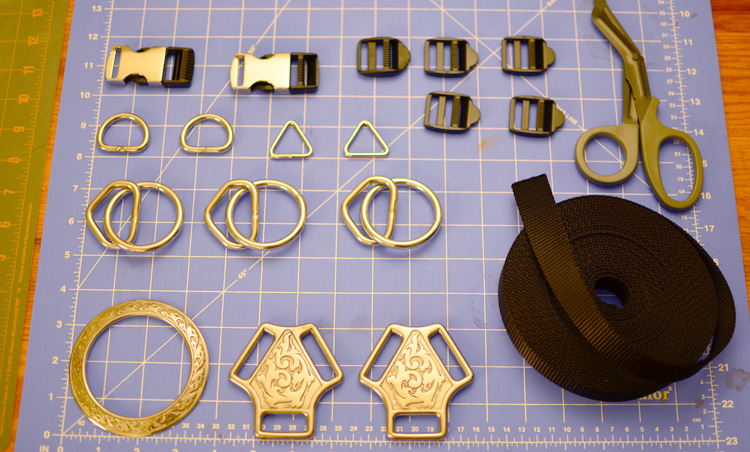
- 1 • 2 3/4″ Breast Collar Ring (We used the Horseshoe Brand from S&D Trading Co.)
- 2 • Martingale Centers (Again, Horseshoe Brand from S&D Trading Co.)
- 3 • Welded Halter Loops & Rings (More from S&D Trading Co.)
- 2 • 1″ Steel Tri-Loops (We got ours from Strapworks.com)
- 2 • 1″ D-Rings (The pretty, matching ones are Horseshoe Brand from S&D Trading Co., but we already had some from Strapworks.com)
- 2 • 1″ Side-Release Buckles (We used metal/plastic hybrids for maximum shiny, from Strapworks.com)
- 5 • 1″ Strap Adjusters (More from Strapworks.com)
- 1″ Flat Nylon Webbing/Strapping (From Strapworks.com – Length varies, see note below.)
- 1 • Climbing Harness (We used the Black Diamond Alpine Bod from Amazon)
About the webbing/strapping: Remember that your body size will determine how much webbing you’ll need. We ordered 45 feet and had enough for two average-build harnesses with plenty left over for mistakes. It’s relatively cheap (seriously, $20 for 45 feet?), so order a lot.
Tools
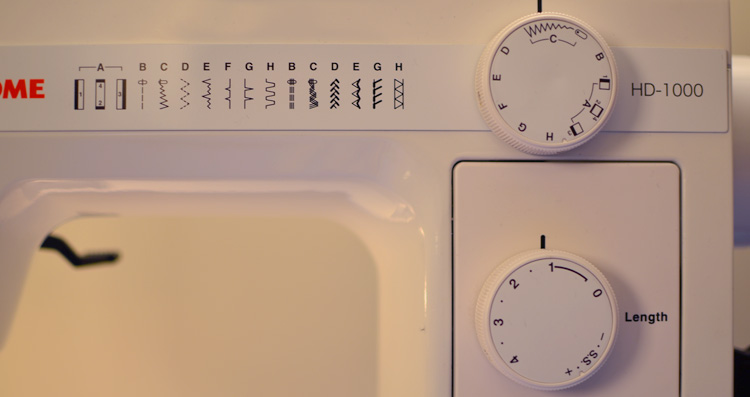
- Sewing machine strong enough to sew through nylon webbing. We used a medium zig-zag stitch, length 1, on everything for strength. We used a Singer 90/14 needle.
- Scissors or shears strong enough to cut through thick nylon webbing
- Butane lighter or heat gun for melting the ends of freshly-cut nylon webbing. See note below.
- Optional: 1″ adjustable straps for mocking-up the harness during measuring
- Optional: Hot glue gun
About cauterizing nylon: Nylon is the softest webbing material that’s readily available, but melted nylon can form sharp points that could damage rubber or spandex. Be sure to read the note about glueing the rough parts near the end. Also, melted nylon fumes aren’t a great thing to breathe, so be careful.

Instructions
- The Back Ring
- The Chest Strap
- The Shoulder Straps
- The Underarm Straps
- The Belly Straps
- The Anchors
- The Finishing Touches
Part One: The Back Ring
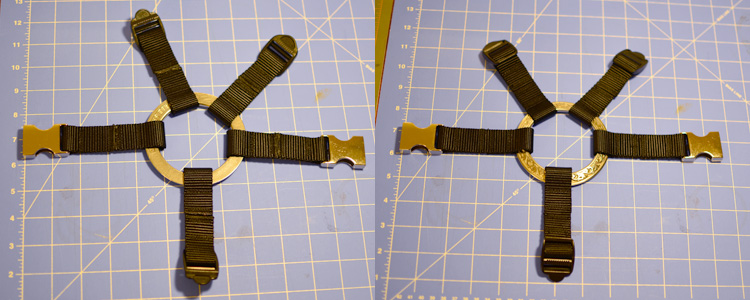
- Cut five 8-inch lengths of the Webbing and cauterize the ends with a lighter or heat gun.

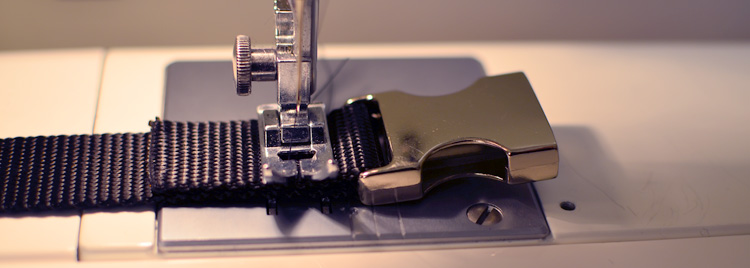
- Loop one of the lengths through the receiving-end of the Side-Release Buckles and fold it in half until the end doubles back to the midpoint. Note: If your buckles aren’t symmetrical, make sure the folded end is on the back side so it’ll be hidden by your body when worn.

- Sew the Webbing in place as close to the Buckle as you can. Then sew it again as close to the length’s end as you can. (For extra strength, you could box-stitch every one of these connections, but two or three lines like this should provide enough strength for average use.)
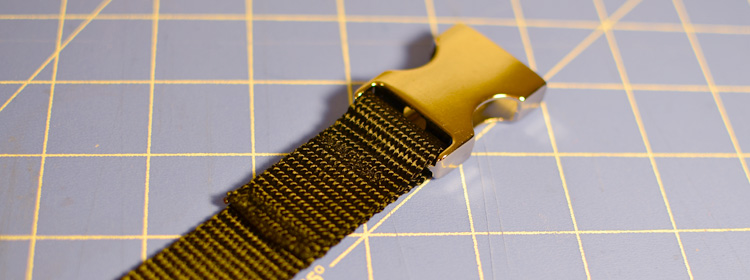
- Repeat for the other Buckle.
- Repeat the same process for 3 of the Strap Adjusters, again making sure you’ve got the Webbing folded so the ends are on the back side and the Strap Adjuster won’t be pressed awkwardly against the body. (I messed this one up a couple times.)

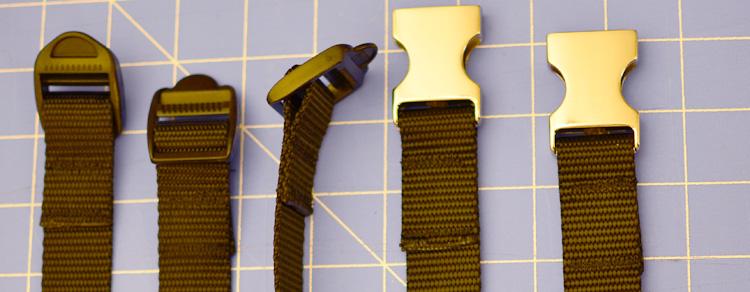
- Now it’s time to turn the Breast Collar Ring into a five-point star. IMPORTANT: Make sure the two Buckles are NOT directly next to each other. Sew all five of the pieces you just made onto the Ring, making sure the folds stay on the back side.
Part Two: The Chest Strap
- Take some spare Webbing and temporarily loop it through the two Martingale Centers at their endpoints. Position these on your chest across your sternum so that they will sit comfortably under load. Measure how much Webbing you’ll need to loop around both of them so the ends meet, just like the five lengths you just finished. (I found that it fit best just above my nipples with the ends of the Martingale Centers about nipple-width apart, total length about 10″)
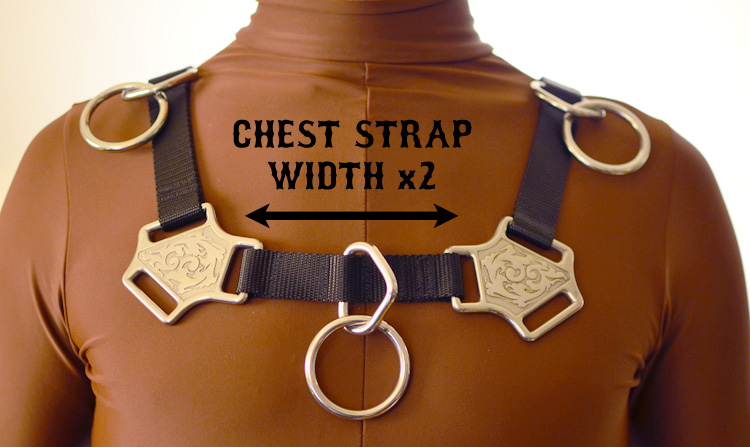
- Cut a length of the Webbing to match your measurement and cauterize the ends.
- Loop one end of the length through one of the Martingale Center endpoints, but just enough to sew it in place securely. This is different from the other lengths you’ve made, the ends will NOT meet at the center! You’ll need to anchor one of the Halter Loops in the center in a later step.
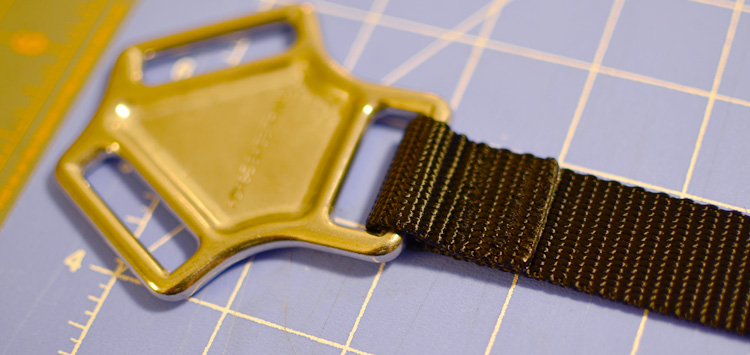
- Sew the Webbing in place as close to the Martingale Center as you can, using a box-stitch or at least two or three lines for strength.
- Loop the other end through the first Welded Halter Loop & Ring (at the long part of the triangle) AND the other Martingale Center until the two ends of the Webbing meet somewhere off-center. Sew ONLY the end for now, leaving the metal hardware loose in a relatively large loop.
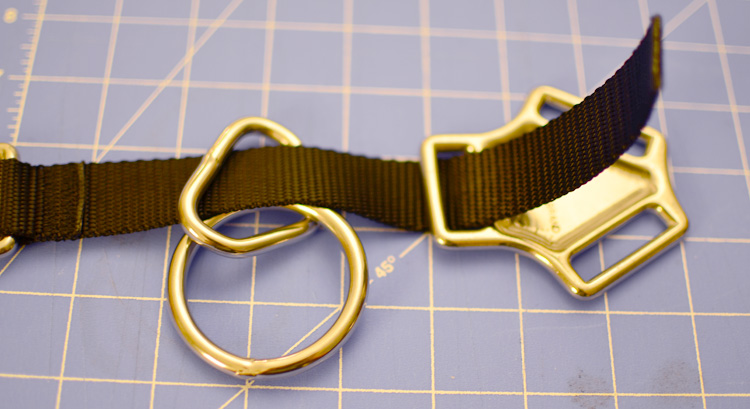
(And remember to make sure that captive ring is facing front!)
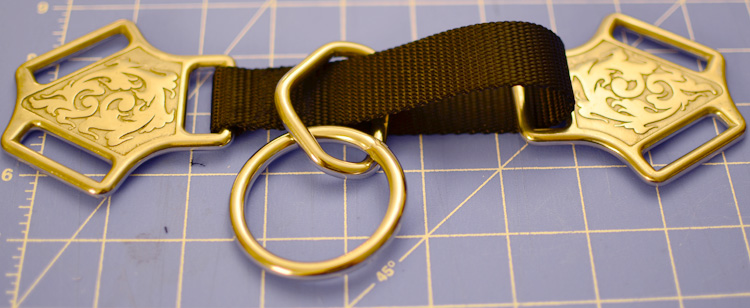
- Pull the two Martingale Centers taut and find the center of the Webbing between them. This is where you’ll be attaching the Halter Loop
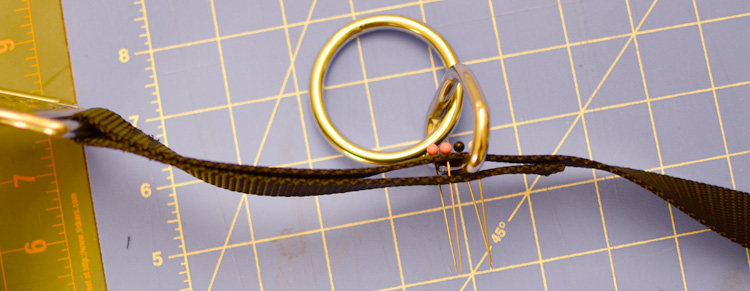
- Clamp or pin the Webbing together to hold the Halter Loop in the center and sew it in place, starting from the side nearest the ends of the Webbing. Getting the needle close without moving the Halter Loop was pretty difficult, so be patient with this part.
- Sew the remaining Martingale Center in place and, if desired, reinforce your stitches for strength with a few extra lines or a box.
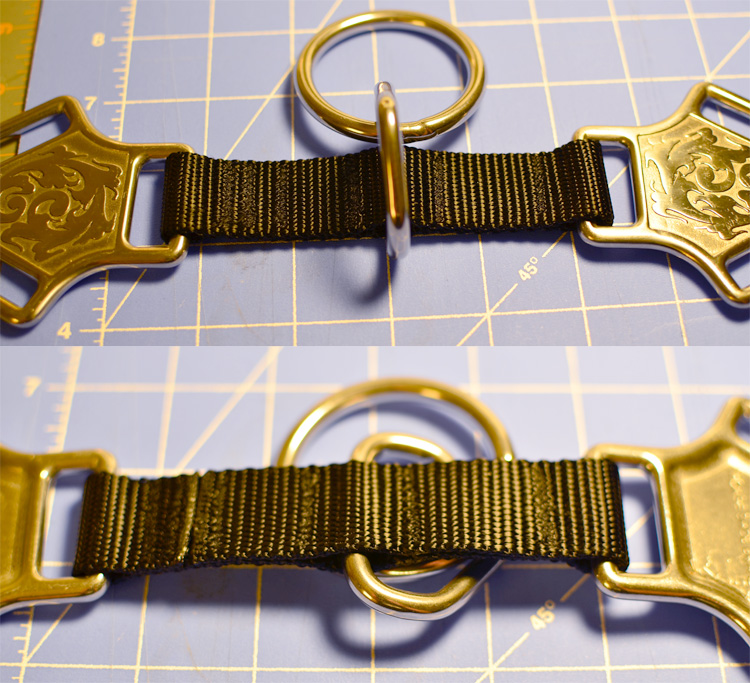
Part Three: The Shoulder Straps
- Time to take a pile of measurements… you’ll probably need a friend to help you with this part. If you’ve got the extra straps or string to do a mock-up, that makes this process a lot easier. Hold the chest piece you just finished across your sternum where it should sit when the harness is completed.
Also hold the Breast Collar Ring against the center of your back where it will sit when the harness is completed. The two Side-Release Buckles should be able to reach horizontally around your chest under your armpits. The single Strap Adjuster should fall vertically toward your tailbone, forming a perfect T with the Buckles. The remaining two Strap Adjusters will join with the shoulder straps you’re about to measure (or if you’ve got extra straps for a mock-up, use those as temporary shoulder straps).

- You’ll be taking two measurements here: Measure from the top loops on the Martingale Centers to the top of your shoulder (where one of the Halter Loops will go). Also measure from the top loops all the way over your shoulders to the center of your back where the Breast Collar Ring will sit. Again, if you’ve got the straps to mock this up, you can just measure the straps once you’ve got the two pieces positioned properly.
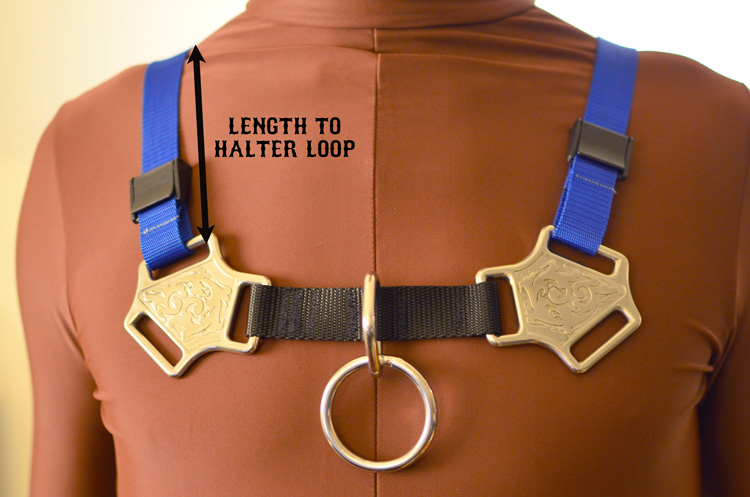
- Since the shoulder straps will double back from the Martingale Centers to your shoulder Halter Loops, you’ll want to add both measurements together for the MINIMUM amount of Webbing to cut. I say MINIMUM because one end will be threaded through the Strap Adjuster, so you will want to add several inches for a good safety margin. Since the webbing is cheap, we added upwards of a foot on both straps.
- Cut and cauterize two lengths of Webbing, both of them equal to your combined measurements + safety margin.
- Loop one of the lengths through the top loop of one of the Martingale Centers and pull enough through to cover the distance you measured to your shoulder. Longer is better! You can always cut the excess away or sew it in place. Also, remember to do this on the back side of the Martingale Center, the side that will be touching your shoulders.

- Sew the Webbing in place as close to the Martingale Center as you can, using a box-stitch or at least two or three lines for strength.

- Clamp or pin the Webbing together to hold the Halter Loop at the top of the shoulder and sew it in place, starting from the Martingale Center side to make sure both layers stay the same length. Again, a box stitch or a few lines will add strength.
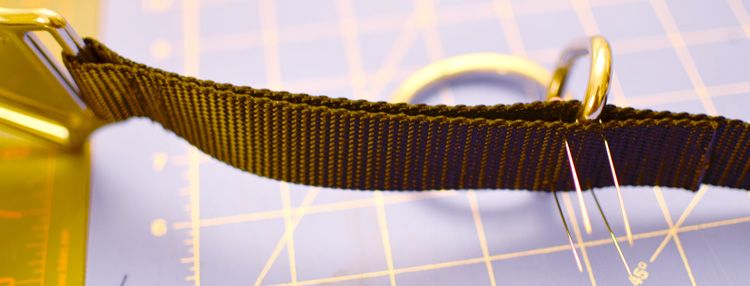
- Sew the excess Webbing (or trim and cauterize, then sew the excess) to itself.
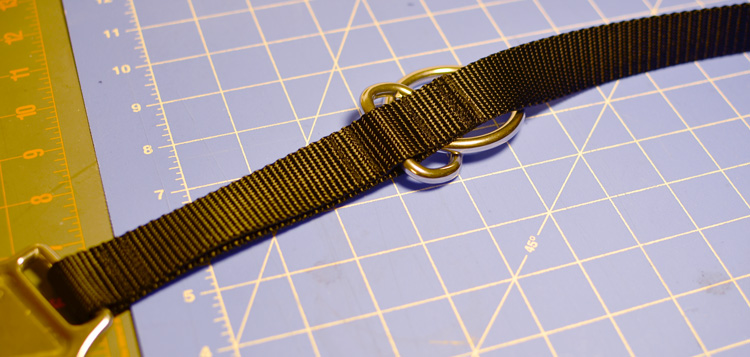
- Repeat for the other shoulder strap.

- Thread the tails of the shoulder straps through the two Strap Adjusters that are directly next to each other on the back ring. Check the photo for proper fit.

Part Four: The Underarm Straps
- Mock-up and measuring time again! This time we’re trying to position the two Steel Tri-Loops so they’re comfortably under the arms, slightly forward of the armpits. The Tri-Loops will connect the Martingale Centers above, the Buckles behind, and the Climbing Harness all the way down at the pelvis (which we’ll cover later). When the harness is complete, all these straps will form a coffin-shaped hexagon on the pony’s front, and the strap joining the Tri-Loops and the Buckles should be horizontal. See the photos for how we mocked-up the upper fitting using blue cargo straps.
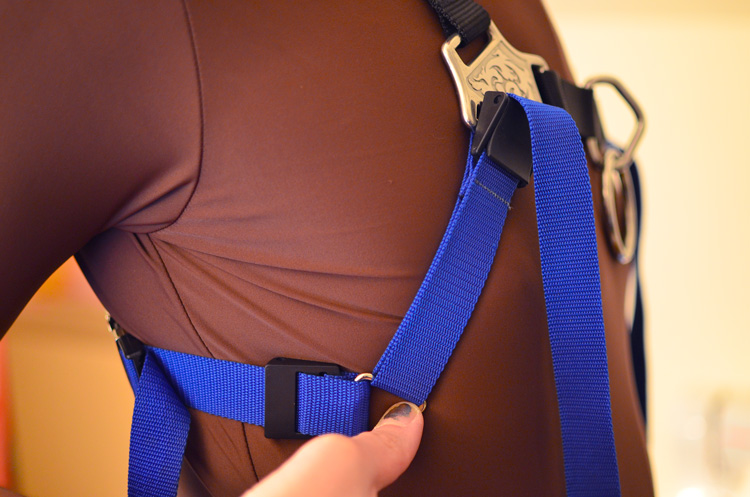
- You’ll be taking two measurements here: For the chest strap, measure from the last remaining side of the Martingale Centers to the desired locations of the Tri-Loops on either side. This strap will be permanently sized, so make sure your measurement is exact. For the underarm strap, measure from the Tri-Loops to the Buckles. Since the Buckles also act as an adjuster, you can measure this one a little long.
- Since these straps will be under the arms, we decided to keep them as thin as possible. Add at least four inches to your chest strap measurement and several inches to your underarm strap measurement (since that one can be cut shorter afterward). The extra inches will allow you to fold over just enough Webbing to attach all the hardware.
- Cut and cauterize both chest straps and underarm straps according to your measurements.
- Loop one of the chest straps through a Tri-Loop and fold just enough to be able to sew a couple lines (or a box-stitch) to hold it in place, then sew the Webbing in place.

- Loop the other end of the chest strap through the Martingale Center and double-check your measurements. Sew the Webbing in place.

- Repeat for the other chest strap.
- Loop one of the underarm straps through the Tri-Loop and fold just enough to be able to sew a couple lines (or a box-stitch) to hold it in place, then sew the Webbing in place. Make sure the strap is pointing AWAY from the chest piece, it may not be possible to reposition it afterward.

- Repeat for the other underarm strap.
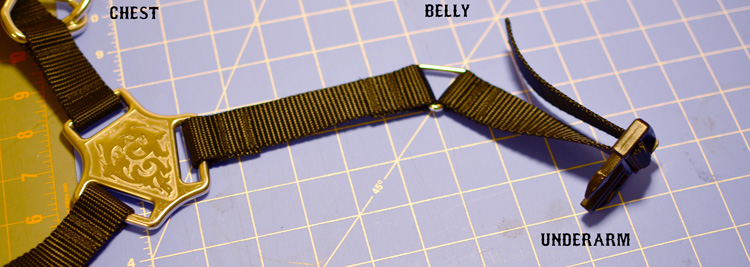
- Thread the remaining Buckles onto the underarm straps. You can now try on the completed upper portion of the harness and check the fitting. Remember that the overall fit and feel depend on three more straps pulling downward to the Climbing Harness, but this stage should give you an idea of the fit so far.
Part Five: The Belly Straps
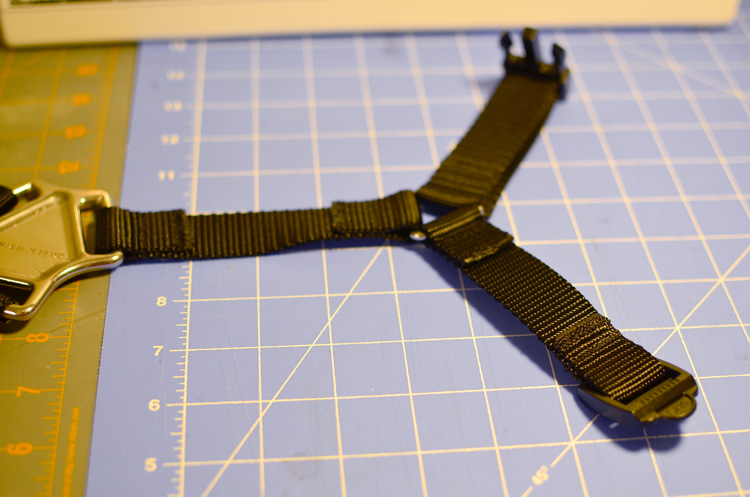
- The belly straps are actually three parts for adjustability and variable angle: an upper length, a lower anchor, and an adjustable length between them. For easy construction, we made the upper (non-adjustable) portion similar the strap adjusters you’ve already attached to the Breast Collar Ring on the back. Use your own judgement if you’d like your strap adjusters to sit higher or lower relative to the chest piece, but make sure to leave at least a few inches above the Climbing Harness belt for the lower anchor.
- Cut two 8-inch lengths of the Webbing (or whatever your measurements were) and cauterize the ends with a lighter or heat gun.
- Loop one of the lengths through the receiving-end of the Strap Adjusters and fold just enough to be able to sew a couple lines (or a box-stitch) to hold it in place, then sew the Webbing in place. Again, make sure you’ve got the Webbing folded so the ends are on the back side and the Strap Adjuster won’t be pressed awkwardly against the body.
- Repeat for the other Strap Adjuster.
- Sew these two upper lengths to the remaining sides of the Tri-Loops, making sure to keep all the folds on the same side.
Part Six: The Anchors
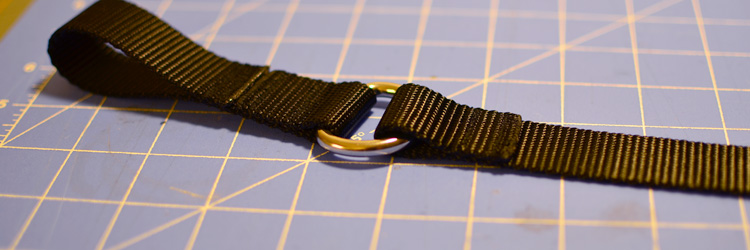
- On to the anchors. You’ll be sewing a short (mine were 8″-9″) length of Webbing onto a D-Ring, then folding the tail over and sewing it into a loop that will wrap around the Climbing Harness belt. The measurements will depend on your particular belt’s width and the size of its buckle. I found it best to attach a D-Ring to the uncut spool of Webbing first, so here we go…
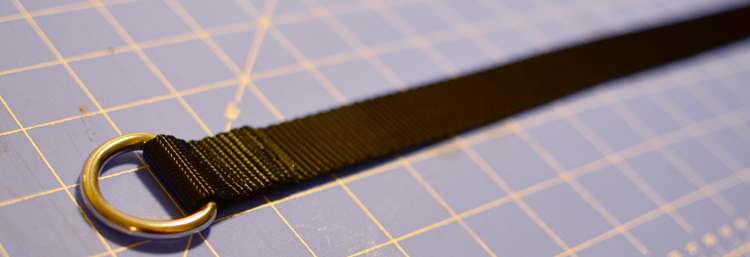
- Loop the cauterized end of the Webbing spool around the flat side of one of the D-Rings and sew it in place.
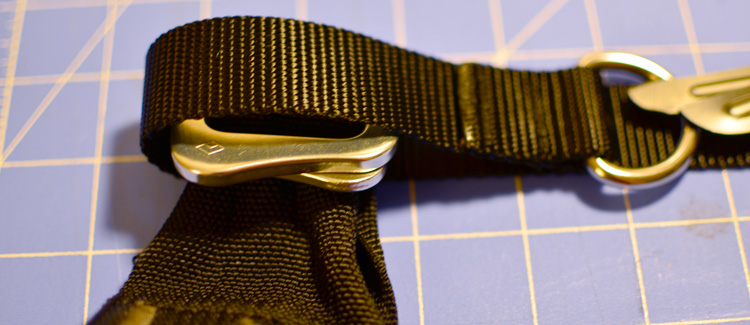
- Grab your harness and measure how much Webbing you’ll need to make a loop that the belt AND the buckle can pass through. Remember that you’re going to take up a good inch or more to sew the Webbing securely. I held the loop in place with the fattest part of my thumb and made sure I could pass the Climbing Harness buckle through the loop before cutting and cauterizing.
- Sew the end of the Webbing you just cut and cauterized so it’s touching the other end wrapped around the D-Ring
- Repeat for the other anchor.
- For the adjustable middle length, we’re simply going to add a length of loose Webbing to both D-Rings. How much depends on the length of your torso, how much belly the pony has, etc. So we’re going to do this with the uncut spool again.
- Loop the cauterized end of the Webbing through the D-Ring on one of the anchors and sew it in place.
- Put the Climbing Harness on and slide the anchor onto the belt before securing the harness. Also put the completed upper portion of the harness on if you aren’t already wearing it.
- It may help to have a friend hold the unanchored ring in place on your back while you do this. Thread the tail of the Webbing spool through the corresponding Strap Adjuster and cinch it just tight enough to take up the slack. You’re going to need at least this much, but add a few inches to be safe. You can always cut the tail short later.
- Cut and cauterize the Webbing with enough excess for safety (or for when you gain a few pounds, or loan the harness to a bigger pony…).
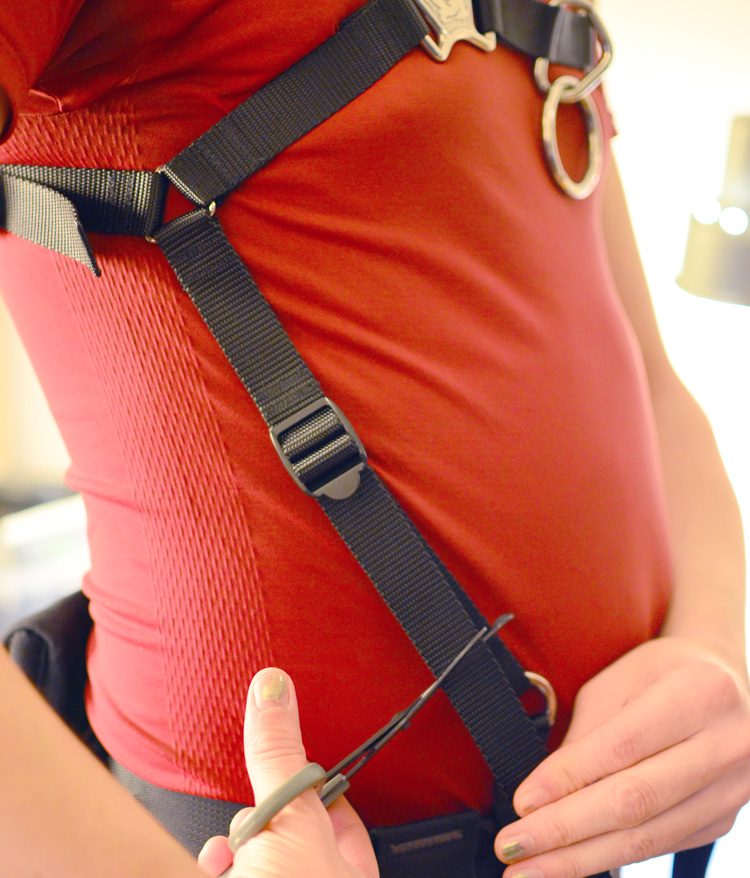
- Repeat for the other anchor.
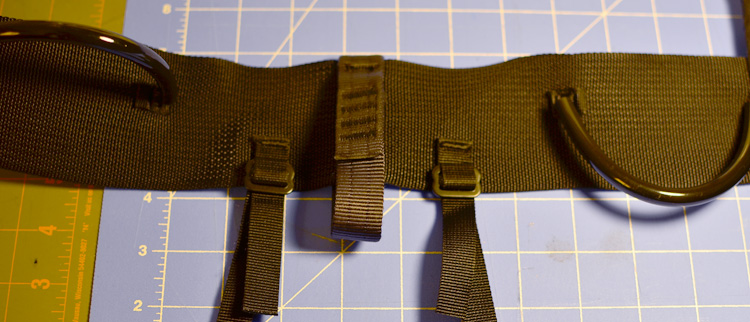
- This is the only part of the process where we permanently altered the Climbing Harness. You could find another way to anchor the back ring to the harness, but this seemed like the easiest thing to do and doesn’t affect its ability to function as a real piece of safety equipment. We just hand-sewed the remaining Webbing directly onto the rear strap of the Climbing Harness. If your harness doesn’t have one of these loops, you should be able to simply create a third anchor by looping the Webbing around the belt and sewing it in place.


Part Seven: The Finishing Touches
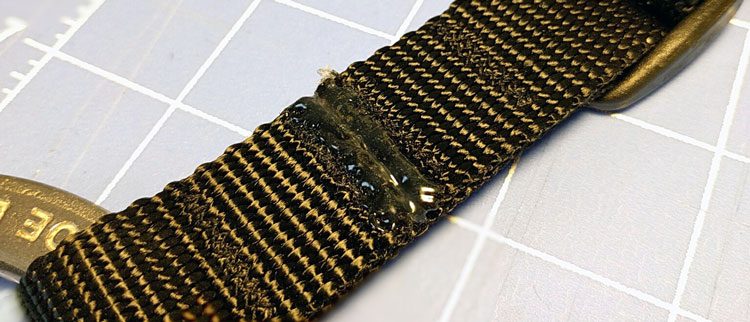
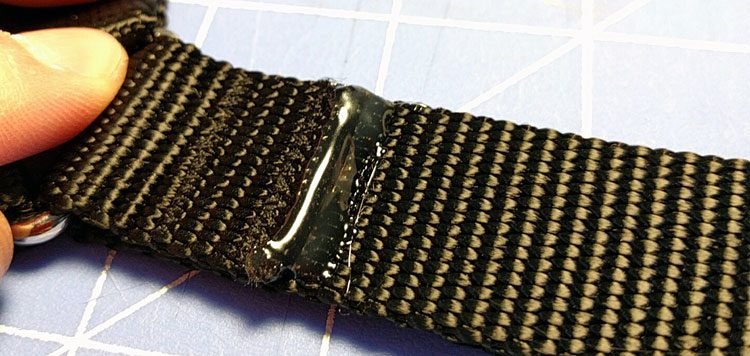
- OPTIONAL, BUT HIGHLY RECOMMENDED: The cauterized ends of the Webbing are like thousands of tiny Velcro hooks which can damage a Spandex body suit. You can, however, seal those hooks in hot craft glue to protect your pony skin.
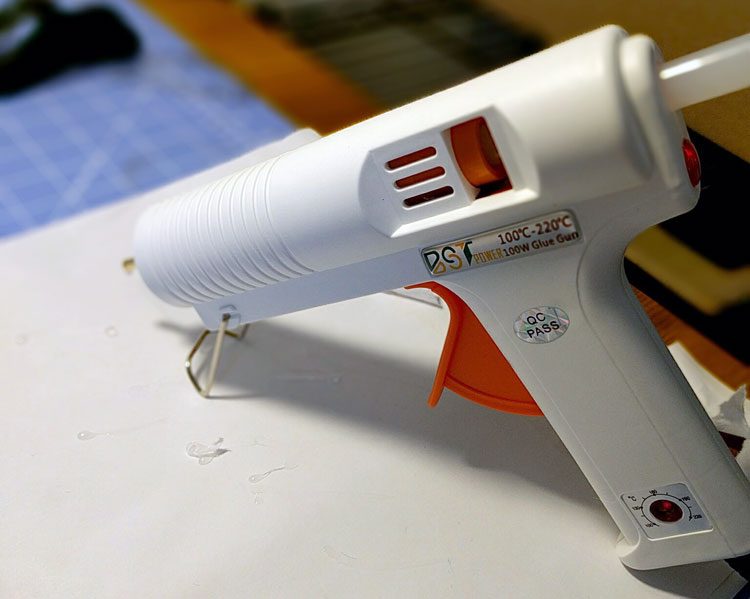
- To make things a bit easier, trim whatever spiky bits you can from the ends of the Webbing and even cut the corners a little so your glue won’t be visible from the front. Be careful not to cut any of the stitching you just made, though!
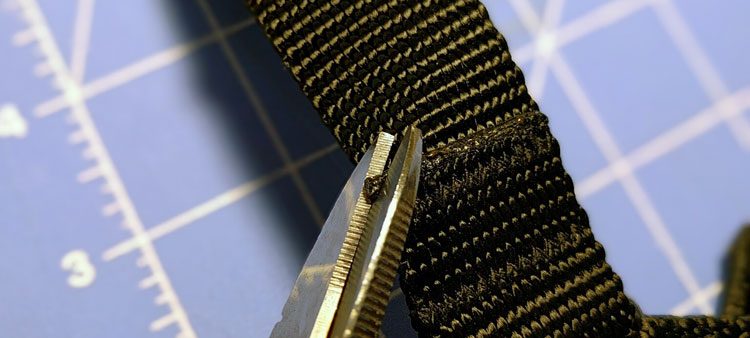
- Coat every end of the Webbing that will rub against the body with glue. You’re not looking for a massive blob, just enough to seal in the troublesome bits. Also, make sure your glue temperature isn’t so hot it will melt or damage the nylon.
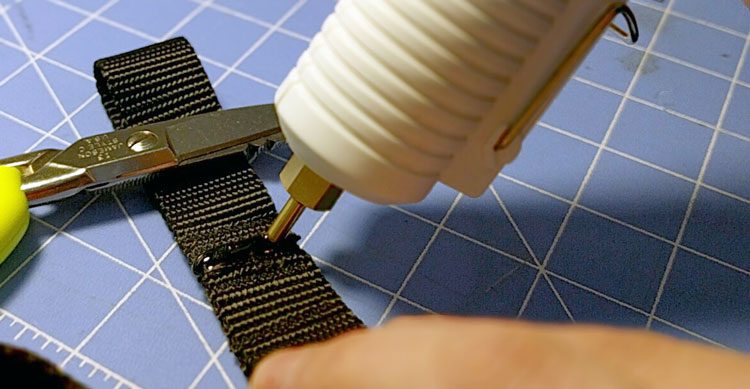
- Let each coating cool and dry before moving on. Instead of spiky, the ends should now have a rubbery texture that won’t snag spandex or abrate rubber body suits.
- Put the harness on (both halves should be attached via the belly straps by now) and thread the super-long tail in back through the final remaining Strap Adjuster attached to the back ring. (It really helps to have a friend do this, unless you’re a lot more flexible than I am.)
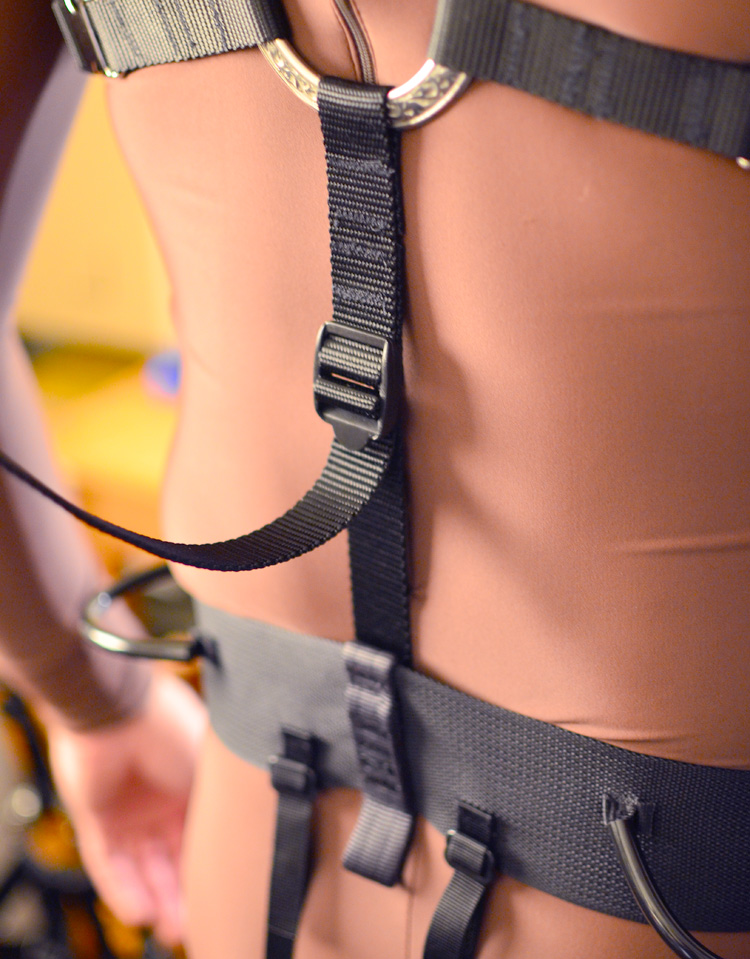
- Have a friend help you tighten and adjust all the various adjustment points. Then have that same friend hitch you up to a cart (using the load-bearing parts of the Climbing Harness) and go have fun!
- OPTIONAL: After wearing this harness in real-life play several times, you may want to shorten the tails on the various adjusters and buckles. If you find yourself threading the straps through the adjusters on a regular basis, be sure to trim the tails into points for easier handling.

