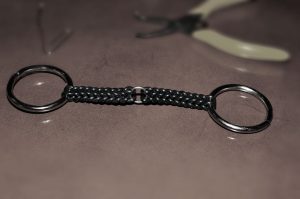
The bit (or bit-gag) is an essential part of pony play (and pony work!), but expensive dental repair doesn’t have to be. Many people just wrap a steel snaffle bit with athletic tape to try and soften the surface, but here’s an inexpensive way to make a strong, useful, machine-washable bit that a human pony can bite down on without fear of injury.
Parts
- 20 or more • 1/2-inch (inner diameter), 1/8″ thick Neoprene Rings
The number will determine the length, the size will determine the girth of the bit. Available on Amazon as a 100-pack – Dash Size 206. - 2 • 14ga. Stainless Steel Jump Rings
Similar size to the rubber rings, in this case 17mm (outer diameter). Available on Amazon as a 95-pack. - 2 • 2-inch Metal Rein Rings
Any metal rings from the local hardware store will do, it depends on the look and material you’re shooting for. Stainless steel will be easiest to wash. - 2 • pairs of needle-nose pliers
- 1 • Crochet hook or paperclip to help thread rubber rings.
Instructions
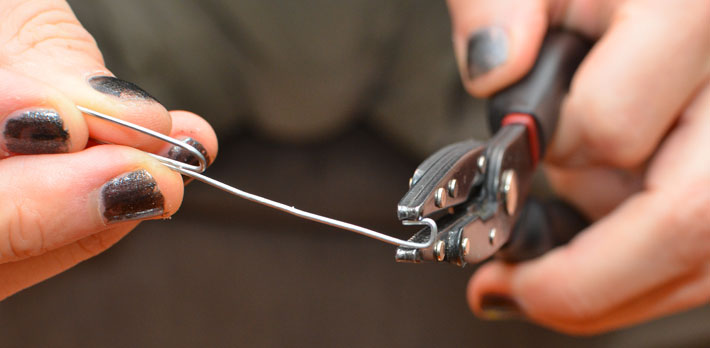
- If you don’t have a crochet hook, bend the paperclip into a hook just big enough to grab the rubber rings. Adding a slight arch to it will make things easier.
- Use the hook or pliers to wrap the first rubber ring around one of the rein rings and hold it in place. This is the most difficult part.
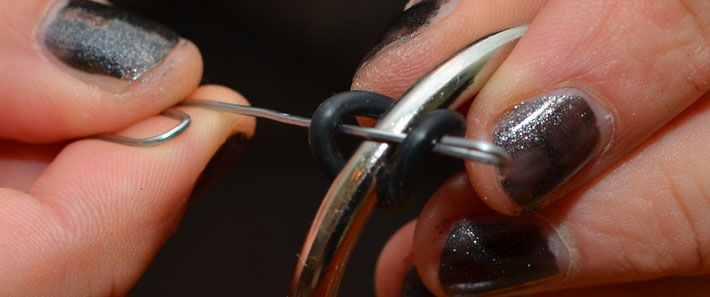
- Grab the next rubber ring and pull it through the loop made by the previous ring.

- Repeat the previous step until the bit is long enough to go from the middle of your mouth to where the rein ring should sit at your cheek. Usually about 10-12 rings, depending on the size of your mouth.

- Use the pliers to twist open one of the small steel rings just enough to fit the last rubber ring.
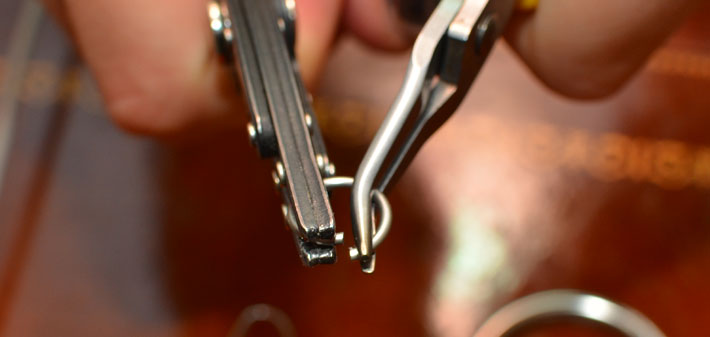
- Thread the steel ring through the last rubber ring to hold it in place while you build the other half of the bit.
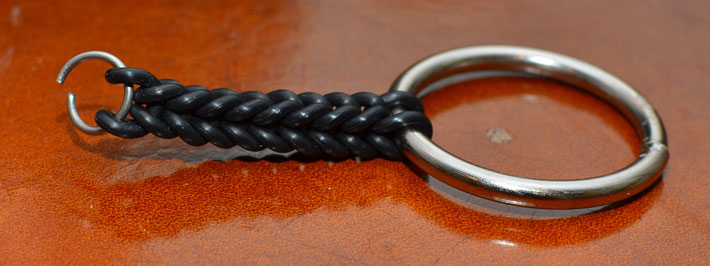
- Go back to step 2 and repeat the process until you’re ready to thread the last rubber ring onto the steel ring in the middle.

- Once the second half is threaded onto the center ring, use the pliers to twist the ring closed again. Make sure the steel ring’s gap is as tight as possible to avoid leaving sharp edges.

- For extra strength, thread the other steel ring alongside the first one.

Now you have a good, strong bit that won’t damage your teeth!

